The apron could have been made from
basswood ¾” deep:

Here's the longer apron with a brass jewellery finding.

I cut two false
drawer pieces. On the right hand piece, I’ve pencilled from corner to corner to
find the centre of the piece, then drilled through both pieces.

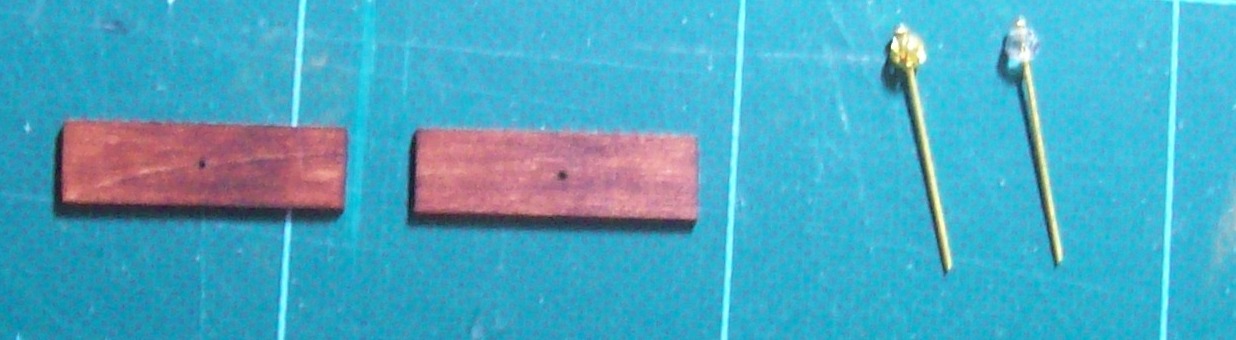
The faux drawer pieces were then glued to the apron and the holes redrilled to go through the apron, then the head pins and beds inserted in the holes. (The brass is on the left and the crystal on the right - just for illustration purposes.) At this point, I would decide which bead I was going to use and make both the same. Then I would clip off the excess head pin from the back of the apron, remove them, apply glue to the back of the bead and the remaining visible length of the head pin and reinsert in the holes.

And here it is in place. (I didn't remake the table - for demonstration purposes I just slipped the longer apron in place over the shorter apron of the original table. And it slipped a bit as I was taking the picture so it looks a bit wonky.)

But I hope this gives you a couple ideas of how you can vary the basic table and make it your own.
As I was searching for the picture of the table base from the top and found the picture of the base for the quilt shop table, I realized that the basic idea of the table base could also be used to make a simple bed such as the one Trineke was asking me about for her attic room. So I'll tackle that later and put up a tutorial.
I need to be at the computer for the next couple hours to follow great nephew Matt's Manitoba team as they play in the semi-final of the Canadian Junior Men's Curling Championship. Go, Manitoba!!!
No comments:
Post a Comment